On this page (8 sections)
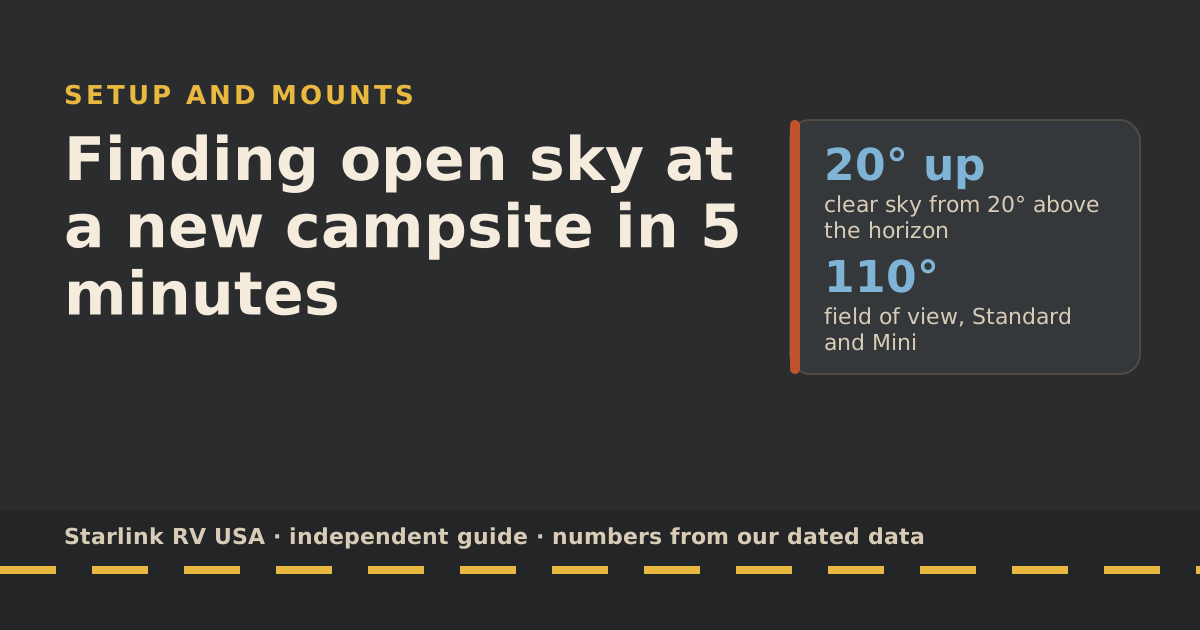
To find open sky at a new campsite, stand where the dish will go and run the Starlink app’s Check for Obstructions scan with your phone held at dish height. Try two or three spots within reach of the cable before you level and unhitch. Starlink wants an unobstructed 360° view of the sky from 20° above the horizon up, so you’re looking for the spot where nothing tall pokes into that cone.
Doing this before you settle the rig is the whole trick. Once the slides are out and the awning is down, moving 20 feet is a chore. Five minutes on arrival saves an evening of buffering.
What the dish actually needs to see
Think of an upside-down cone sitting on the dish. It starts 20° above the horizon all the way around and opens straight up. The Standard and Mini both have a field of view of 110°. Starlink’s satellites move across that cone constantly, and the dish hands off between them.
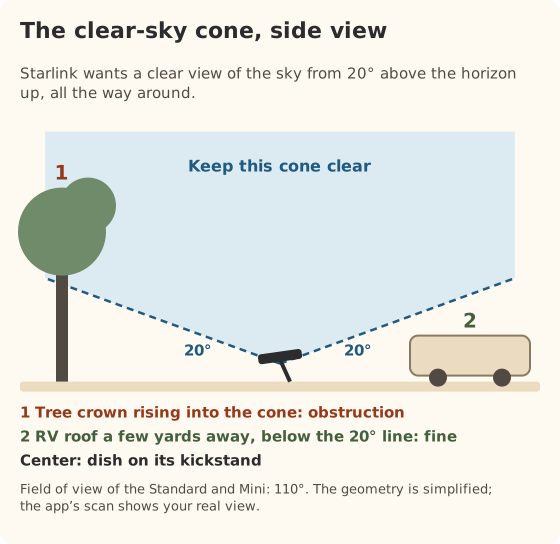
Starlink explains that a dish in the US has tens of satellites in view, and that it builds a live map of what’s blocking it. For mobile setups it reroutes in tens to hundreds of milliseconds when something gets in the way. That’s why a few branches often work fine. The trouble starts when, as Starlink puts it, all available satellites are obstructed at the same moment. That’s when you see short dropouts.
Rules of thumb that follow from the geometry:
- Height beats distance. A tree 30 feet away that rises well above the 20° line hurts more than a picnic shelter right next to you.
- Your own rig counts. A tall fifth wheel or an open awning next to the dish can block the low part of the cone on one side.
- Neighbors move. A big rig pulling into the next site can change your view tonight.
- Spring leaves are new obstructions. Starlink lists leaves coming back in spring as a common cause of new obstruction alerts.
The 5-minute routine
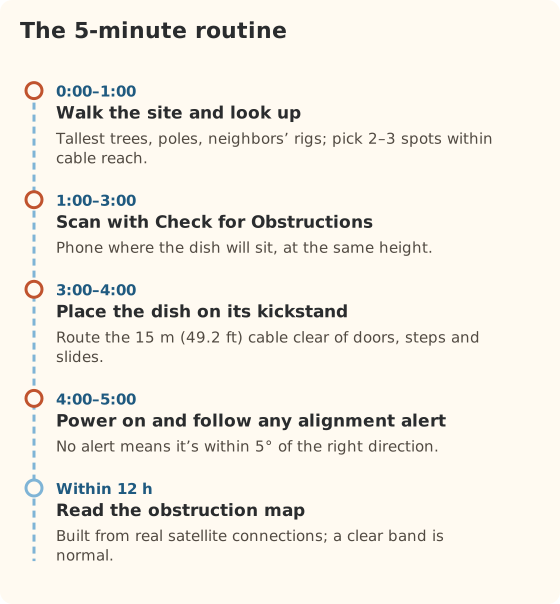
Minute 0 to 1: walk the site and look up
Stand in the middle of the site and turn a full circle. Note the tallest trees, light poles and buildings, and where your rig will sit. Pick two or three candidate spots for the dish within cable reach of where the cable will enter the rig. The Standard kit comes with a 15 m (49.2 ft) cable between the dish and the router, and Starlink says not to splice or extend it.
Minute 1 to 3: scan with the app
In the Starlink app, choose Check for Obstructions. The home screen also has Find an Install Location, where you pick your hardware first so the scan uses the right field of view. Then:
- Hold the phone where the dish will sit, as close as you can to its height and angle.
- Follow the guided scan; it uses the camera to see what’s in the dish’s view.
- Read the result. Starlink says the tool gives an overview of the expected experience for different activities.
- Repeat at your other candidate spots.
If you plan to put the dish on a pole or the roof, scan at that height. A spot that fails at ground level may pass from 10 feet up.
Minute 3 to 4: place the dish
Set the dish on its kickstand at the best spot. Starlink’s setup guide says to use the kickstand so the dish is tilted. Keep the cable out of the path of slide-outs, steps and doors; Starlink warns that kinks and door-jambs can damage it. Route it so nobody trips at night.
Minute 4 to 5: power on and align
Power up and open the app. Once it connects, the app tells you if the dish needs rotating and shows you how. Starlink says that if the dish is already within 5° of the right direction, you won’t get an alert. Don’t guess direction from a forum post; follow the app.
Later: read the obstruction map
After the dish has been online a while, open Obstructions in the app. This map is built from real satellite connections, not from the camera scan. Starlink says it can take up to 12 hours to complete and that it detects most obstructions in less than a day. A thick clear band on the map is the geostationary exclusion zone. Starlink says that’s normal and always shows empty.
Reading the result
| What you see | What it means | What to do |
|---|---|---|
| Scan clear, no alerts | Good spot | Settle in |
| Small patch obstructed near the bottom | Some brief drops possible | Fine for streaming and email; plan calls with a backup |
| Large patch high in the sky | Frequent interruptions likely | Try another spot or raise the dish |
| “Starlink Obstructed” alert | Starlink says outages are most noticeable during video calls and gaming | Move or raise the dish if calls matter |
| Clear band across the map | Geostationary exclusion zone | Nothing; it’s normal |
When to pick another site
Move the dish, or the rig, when:
- No spot within 15 m (49.2 ft) of your cable entry scans clear, and you need video calls. Dropouts hit calls first.
- The obstruction is high and close, like a big tree right over the pad. A pole may not clear it.
- You’re staying several nights. Ten minutes of moving buys days of steady service.
Stay put and adjust expectations when:
- You only need email and maps tonight. Short drops don’t matter much.
- You can use cellular. Phones and dishes see different things; a good LTE signal can carry the call. Our cellular-first guide shows how to set that up.
For campgrounds that are tree-covered end to end, our trees guide covers poles and site choice in detail.
Three common sites, three answers
Open desert pull-through. Nothing taller than a fence post for a mile. The scan will almost always pass anywhere on the site. Put the dish where the cable run is shortest and safest, away from the door and steps, and skip the second and third scans.
Wooded state park loop. Tall pines all around, a gap over the driveway. Scan the middle of the driveway first, then the front of the site near the road, where the canopy usually opens over the pavement. If the best spot is outside your site’s boundary or across a road, don’t use it: keep gear and cable on your own site. If nothing passes, plan an offline evening or lean on cellular, and note the site number so you don’t book it again for a work week.
Private RV park, rigs side by side. Open sky above, but tall fifth wheels and motorhomes a few yards away on both sides. Those rigs block the low part of the cone. The fix is usually height or distance: scan with the phone raised to roof height, or move the dish to the front corner of the site, away from the neighbor’s wall. If you’ll be there for weeks, a pole that lifts the dish above the rooflines may be worth it; see mount options.
A pattern runs through all three: you are trying to put the dish where the tallest nearby thing looks short. Distance and height both do that.
What to do when the scan and the map disagree
The camera scan is a prediction; the obstruction map is a record. If the scan passed but the app later shows a “Starlink obstructed” alert, believe the map. Common reasons are a branch the camera didn’t catch against a bright sky, a neighbor’s rig that arrived after you scanned, or the dish being bumped. Look at where the map shows blockage, look up in that direction from the dish, and move it a few feet away from whatever you find.
Common mistakes
- Scanning from eye level for a ground-level dish. The phone should be where the dish will be.
- Picking the spot after the rig is level. Do the scan first.
- Covering the dish. Starlink says not to add protective covers; they hurt performance.
- Laying the cable through a door gap that closes on it. That’s how cables get pinched. See cable pass-through options.
- Judging the site in the first ten minutes. Give the map time if you’re staying more than a night.
What we don’t know
- How a given site scores. Campgrounds change as trees grow and get trimmed. Recent camper reports beat old ones.
- Exactly how much obstruction is too much. Starlink doesn’t publish a percentage cut-off, and it depends on what you’re doing. Calls and gaming are least forgiving.
What to do next
Add this routine to your arrival list, next to the setup checklist. If you’re still choosing a plan, the travel plan picker asks about tree cover and points you to cellular when satellite isn’t the right tool. Before your next trip, run the pre-trip inspection on the mount and cable.
Questions people ask
How do I check for obstructions at a campsite?
Open the Starlink app, choose Check for Obstructions (or Find an Install Location on the home screen), pick your hardware, and hold your phone where the dish will sit, at the same height. Follow the on-screen scan. Repeat at two or three spots.
How much clear sky does Starlink need?
Starlink’s boat install guide asks for an unobstructed 360° view of the sky from 20° above the horizon up. The Standard and Mini have a field of view of 110°. In practice, the higher the obstruction reaches into the sky above the dish, the more it hurts.
Will Starlink work under a few trees?
Often, with some drops. Starlink says the system switches between satellites to route around obstructions, and that obstructions cause interruptions when all available satellites are blocked. Video calls and gaming show the drops first. See campgrounds with trees.
Why is there a clear band on my obstruction map?
That’s the geostationary exclusion zone. Starlink says the dish doesn’t send or receive through that part of the sky, so it always shows unfilled. It isn’t a problem.
Which way should I point the dish?
Let the app tell you. Set the dish on its kickstand; once connected, the app alerts you if it needs rotating and shows you how. Starlink says if it’s within 5° of the right direction, you won’t get an alert.
How long until the obstruction map is accurate at a new site?
Starlink says the map can take up to 12 hours to complete, and that most obstructions are detected in less than a day.
Sources
- How to check for obstructions (Starlink help center), retrieved Oct 6, 2026
- How do I check for obstructions before installing Starlink? (Starlink help center), retrieved Oct 6, 2026
- How should I interpret the obstruction map? (Starlink help center), retrieved Oct 6, 2026
- Obstructions Explained (Starlink help center), retrieved Oct 6, 2026
- How to fix obstructions (Starlink help center), retrieved Oct 6, 2026
- Standard 4 X Setup Guide (Starlink help center), retrieved Oct 6, 2026
- How much cable do I have and how do I route it indoors? (Starlink help center), retrieved Oct 6, 2026
- How to install Starlink on boats (Starlink help center), retrieved Oct 5, 2026
- Standard specification sheet (Starlink PDF), retrieved Oct 5, 2026
Prices and plan rules on this page are filled in from our dated data files when the site is built; hover a number to see when we checked it.
Research and spec-based analysis. We haven’t used Starlink in an RV, van or boat; this post is built from Starlink’s own documents, carrier pages and dated reports, cited above. Links to Starlink’s plan pages here use the site owner’s own referral link: the owner may get a referral reward if you order, and your price is the same. There are no affiliate links. Starlink and Roam are trademarks of Space Exploration Technologies Corp. Starlink RV USA is not affiliated with, endorsed by, or sponsored by SpaceX or Starlink. Spotted an error? Tell us.