On this page (8 sections)
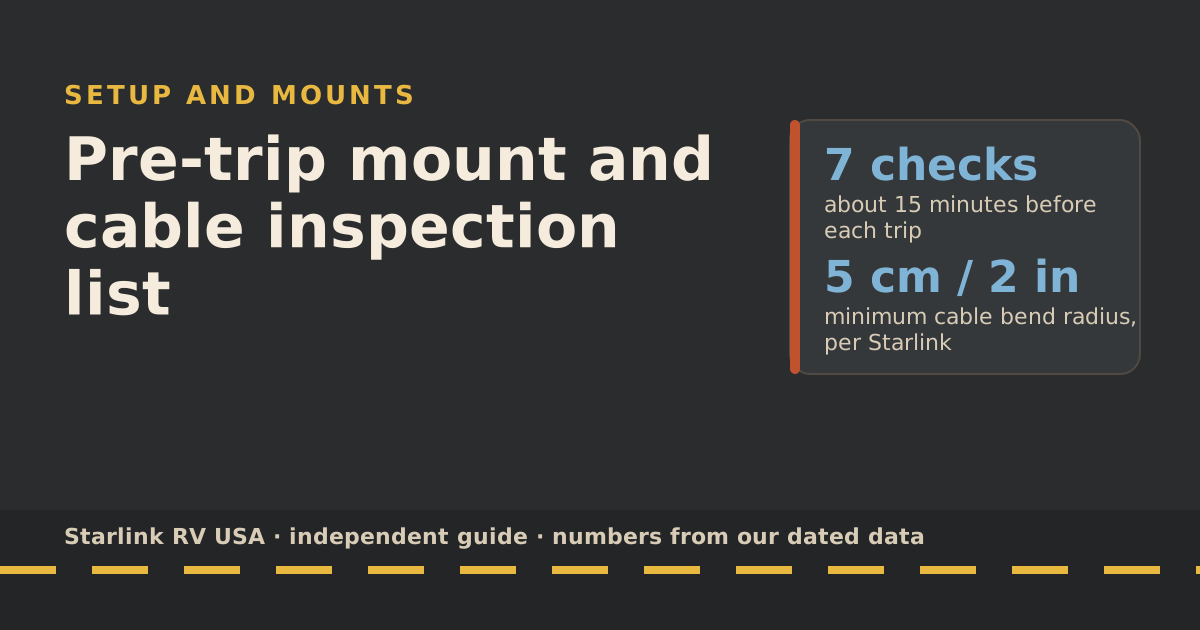
Before every trip, check seven things in this order: the dish face, the mount fasteners, the sealant around any roof holes, the cable run, the cable entry, the connectors, and the router and power supply. Then power it all up at home and run one speed test. It takes about 15 minutes, and it catches the problems that otherwise show up at 9 p.m. in a campground.
This list is built from Starlink’s own install guides, alert definitions and weather notes. We haven’t inspected a rig ourselves; where a step is general RV practice rather than a Starlink instruction, we say so.
The seven check points
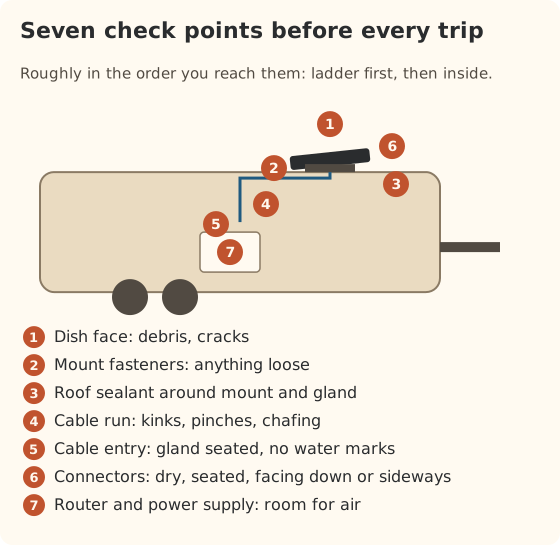
The checklist
| # | Item | What to look for | Fix |
|---|---|---|---|
| 1 | Dish face | Dirt, leaves, bird droppings, cracks | Brush off debris; Starlink says not to add protective covers |
| 2 | Mount fasteners | Any bolt that turns by hand or with a quarter turn of a wrench | Re-tighten with removable thread locker |
| 3 | Roof sealant | Cracks, gaps or lifting around mount feet and cable glands | Reseal with a sealant your RV maker approves |
| 4 | Cable run | Kinks, flat spots, chafing at edges, sharp bends | Re-route; replace a damaged cable with a Starlink one |
| 5 | Cable entry | Gland or grommet loose, water marks inside | Re-seat the gland; dry and re-seal |
| 6 | Connectors | Moisture, debris, not fully seated, facing up | Dry, reseat until the lock clicks, angle down or sideways |
| 7 | Router and power supply | Blocked vents, hot cabinet, loose power cord | Give it airflow; move it out of sun and away from heat |
1. The dish face
Look for leaves, dirt and droppings. Starlink lists material build-up on the dish as a cause of new obstruction alerts. Don’t put a cover on it: Starlink says added protective covers degrade performance.
2. Mount fasteners
This is the step that matters most if the dish rides on the roof. Starlink’s boat install guide says to use removable thread locker (such as Loctite 222) on all mount fasteners so they don’t shake loose. Road vibration does the same thing waves do. Put a wrench on every bolt you can reach. If any turns easily, back it out, add removable thread locker, and torque it back to the mount maker’s spec.
Also check:
- The base. Starlink warns that third-party metal mounts that wrap around the dish’s base, or setting it directly on metal, can hurt GPS and are not supported. If a third-party mount wraps the base in metal and you see GPS-related alerts, that’s a suspect.
- The surface under a Mobility Mount. Starlink’s guides give a minimum surface thickness of 1.5 in for the Standard Mobility Mount and 1 in for the Mini’s. Thin RV roof skin alone may not meet that; look for any flexing.
Starlink adds that Starlink says to hire a professional if you’re uncomfortable with any part of the install. Roof work at height is a real fall risk; if you aren’t comfortable on the ladder, have an RV tech do this step.
3. Roof sealant (general RV practice)
Any screw or gland through the roof is a leak waiting to happen. Look at the sealant around mount feet and cable glands for cracks, gaps or lifting edges. This isn’t a Starlink instruction; it’s standard RV roof care. Use a sealant your RV’s maker approves for your roof material, because the wrong product can damage some membranes.
4. The cable run
Follow the cable from the dish to where it enters the rig. Look for:
- Sharp bends. Starlink’s boat guide gives a minimum bend radius of 5 cm (2 in). Tighter than that risks damage.
- Pinch points. Starlink warns that kinks, debris and door-jambs can hurt service quality.
- Chafing where the cable crosses a roof edge, ladder or awning arm.
- Flat or crushed spots from being driven over or shut in a slide-out.
Starlink is firm on two related points: it doesn’t recommend splicing, extending or using a third-party cable, and the cable is not rated to be buried or under water. If the cable is damaged, replace it with a Starlink cable rather than taping it.
5. The cable entry
Wherever the cable comes in, whether a roof gland, a wall plate or a window gap, check that it’s still sealed. Look inside for water marks under the entry. Our cable pass-through guide compares the five usual ways in.
6. Connectors
Starlink’s boat guide says to position connectors facing downward or sideways so water doesn’t get in, and to make sure no water collects near seals or cables. Unplug each connector, look for moisture or grit, and plug it back until it seats fully and locks.
If the app ever showed a Poor cable connection or Slow Ethernet alert, this is where to look. Starlink defines “Poor cable connection” as a link speed between dish and router that suggests a bad connection or possible cable damage.
7. Router and power supply
Inside, check that the power supply has air around it. Starlink says it can dissipate 30–40 W at full load and has a safety shut-off if it gets too hot. A closed cabinet in a sunny rig in July is how you get a Power supply thermal throttling alert. If it has to live in an enclosed space, Starlink suggests thermally tying it to the enclosure so heat can escape.
One more detail from Starlink: the router factory-resets after 6 power cycles in a row. Flaky shore power or a generator that keeps dropping can do that. If your Wi-Fi name suddenly reverts to “STARLINK”, that’s probably why.
Test at home
Do this the day before you leave, not the morning of.
- Power everything up the way you will at camp: shore power or inverter.
- Wait for it to connect and clear any alerts in the app.
- Let it update. Starlink says the dish downloads new software within 24 hours and reboots to apply it, so leave it powered with a clear sky view for a while.
- Run one speed test. Starlink says each test can use up to about 1 GB, so don’t run many on a capped plan.
- Check your plan. Make sure it’s active, and that you’re on the allowance you need for this trip. Upgrades take effect immediately.
If something fails, you’re still within reach of a hardware store and a good cell signal for support chats.
After the trip
- Stow it properly. For the Standard 4 and Mini, Starlink says to fold the kickstand under the dish for storage.
- Unplug during storms and storage. Starlink recommends unplugging power and disconnecting the cable during lightning or when the system is left unused for long periods.
- Note any alert you saw on the road so you check that spot first next time.
The once-a-season deep check
Once a season, usually before the first big trip, go further than the quick list:
- Take the dish off a removable mount and look at the mount base and the roof under it for cracks, stress marks or soft spots.
- Run the cable end to end with your hands, feeling for flat spots you can’t see.
- Look at the cable entry from inside after a hard rain, with a flashlight, for drips or stains.
- Clean and check the power supply area for dust and blocked vents.
- Update everything at home. Let the dish download any software update on your home connection, where data use doesn’t matter.
Common mistakes
- Using permanent thread locker. You may want the mount off one day. Starlink’s example is a removable grade.
- Taping a damaged cable. Water gets in and Starlink won’t cover damage from modified cables.
- Stuffing the power supply behind cushions. It needs airflow.
- Skipping the test because “it worked last time”. Vibration and storage are when things change.
What we don’t know
- How fast a given third-party roof mount loosens. That depends on the mount, the roof and your roads. Check more often on washboard roads.
- The right torque for your mount. That comes from the mount maker, not from Starlink’s general guides.
What to do next
Pair this list with the site’s setup checklist for every new campsite, and read wind ratings: when to take the dish down if storms are in the forecast. If you’re considering a permanent mount, our roof mount guide covers what it involves. Still choosing a plan for the season? The travel plan picker sizes it to your trips.
Questions people ask
How often should I inspect my RV Starlink mount?
Before every trip, and after any rough road or high-wind day. A quick look takes a few minutes; a full check with a wrench takes about 15. Permanent roof mounts deserve a closer look at the start of each season.
What thread locker should I use on Starlink mount bolts?
Starlink’s boat install guide says to use removable thread locker, such as Loctite 222, on all mount fasteners so they don’t shake loose. “Removable” matters: you want to be able to take the mount off later.
Can I extend or splice the Starlink cable?
Starlink says no. It doesn’t recommend modifying or combining cables, or using third-party cables, because the cable’s seal and power rating are specific to the kit, and damage from that may void the warranty.
Can the Starlink cable lie in water or be buried?
No. Starlink says the cable is not rated to be buried or under water. Keep it off wet ground where you can, and route it away from puddles at camp.
What does the “Poor cable connection” alert mean?
Starlink says it means the link between the dish and router suggests a poor connection or possible cable damage. Unplug and replug both ends, make sure the connectors are dry and clean, and if it keeps showing, follow the steps in the alert.
Should I unplug Starlink during a lightning storm?
Starlink recommends it. For extra protection during lightning, or when the system is left unused for a long time, it says to unplug the power and disconnect the Starlink cable.
Sources
- How to install Starlink on boats (Starlink help center), retrieved Oct 6, 2026
- How much cable do I have and how do I route it indoors? (Starlink help center), retrieved Oct 6, 2026
- What are the alerts on my Starlink App? (Starlink help center), retrieved Oct 6, 2026
- How do I install my power supply unit to prevent overheating? (Starlink help center), retrieved Oct 6, 2026
- Snow, heavy rain, wind, lightning, or extreme temperatures (Starlink help center), retrieved Oct 6, 2026
- Does weather impact my service quality? (Starlink help center), retrieved Oct 6, 2026
- Mobility Mount installation guide, Standard (Starlink PDF), retrieved Oct 5, 2026
- Mini Mobility Mount installation guide (Starlink PDF), retrieved Oct 5, 2026
Prices and plan rules on this page are filled in from our dated data files when the site is built; hover a number to see when we checked it.
Research and spec-based analysis. We haven’t used Starlink in an RV, van or boat; this post is built from Starlink’s own documents, carrier pages and dated reports, cited above. Links to Starlink’s plan pages here use the site owner’s own referral link: the owner may get a referral reward if you order, and your price is the same. There are no affiliate links. Starlink and Roam are trademarks of Space Exploration Technologies Corp. Starlink RV USA is not affiliated with, endorsed by, or sponsored by SpaceX or Starlink. Spotted an error? Tell us.